Monthly Archives: December 2013

How to use Copy to backup an external hard drive

You can backup your files even if they are not located inside of your Copy folder. E.g. if you have many important files saved in an external hard drive you may want to backup them, in case the external hard drive crashes or will be lost or stolen (don't underestimate these risks, even in a safe country it can happen: I was stolen my stuff so I can only tell you to backup everything, even more than 1 time).

On a Mac, just create a link to the folder you want to backup.

On Windows, you can't just create a shortcut. Unless you want to backup the shortcut file. You have to create a symbolic link. Use Symlinker (if you experience problems, launch it as Administrator).

Here is how I do


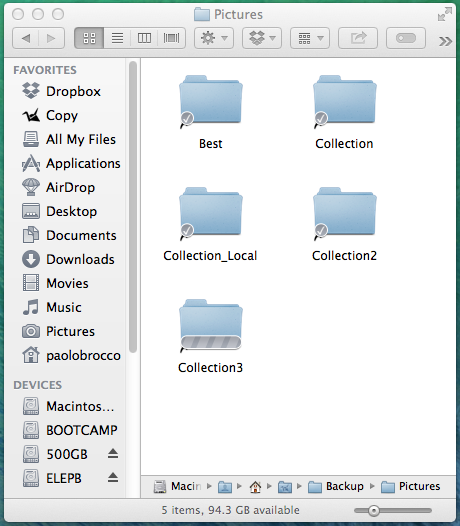
Inside of my Copy folder, I created a sub-folder called Backup. There, I've created the links as you can see in the following picture.

add-links-to-copy

Be careful: when you remove your external hard drive Copy will delete everything that was previously synced/uploaded in the cloud.

A solution to avoid this problem (doesn't happen with Dropbox) is the following.

In your Copy client (in the taskbar, right click on "Copy") go to Preferences > Account > Manage my files > uncheck the "Backup" folder > uncheck "Remove local files" (else you will lose all your original files*) > click on "Save".

[*Be careful with the option "Remove local files": in my case -in my Backup folder- the local files are just symbolic links so if I remove them it's not a problem, but it's a good practice not to remove your local files unless you are 100% sure what you are doing. Do your own tests with test folders, test symbolic links and test data if you are not sure. So you see what happens in the different circumstances. When you know what happens, proceed. I do not take any responsibility if you lose your data.]

At this point the backup folder is not being synced anymore, and you can remove your external hard drive without losing all the files copied on Copy.com. That's right, you can browse to http://www.copy.com, login and see your data in the cloud.

Last week, I unplugged my external hard drive and I lost everything,. That's why I wrote this tutorial. The good thing is that when I plugged my external hard drive, copy synced all the files again, but at a faster speed. I think Copy still had my files in their servers and did a sort of "undelete" operation by comparing the file hashes.

Conclusion: removing the folder as explained above in my solution and adding it back when I want my external hard drive to be synchronized again, seems so far -after my testing- the best practice.

If you haven't yet registered to copy, you can do so by using my referral link and get 20 GB instead of the standard 15 (+5 GB bonus when you use an invitation).

Check also my post Copy vs. Dropbox: Features comparison

C# send a mail using razor views as template

If you are looking for a way to send an e-mail via C#, you may find some code examples such as Send e-mail via SMTP using C#. I used such a solution in many projects, by creating an HTML file in a separate folder, reading its contents, do text replacements and then send the message. That solution always worked fine. I liked my old school solution also because I could edit the HTML file and preview it by clicking it or pointing the browser to its location.

Lately I found a more elegant solution for my MVC projects with a library called Postal. You can install it via NuGet, create a view containing your email template, then, in your controller, you can send a mail just with a few lines of code, as explained in the Getting Started example.

At work I coded a few mailers (to send a reminder, or an occasional newsletter) and they worked quite fast with my old school system. Also with Postal, results have been quite good.

If you are interested in performance, I can code a few tests to see how much each solution can scale. Updates will come, stay tuned.

By the way, if you are interested in creating responsive emails, you may have a look at Bootstrap Template for HTML Email and if you want to convert an existing HTML into a mail friendly HTML (all CSS styles inline), check Premailer.

C# convert HTML to Word

In C#, if you want to create a Word document you can use the OpenXML SDK from Microsoft. With that library you have full control of what you do, however, if you are new to the library, you may not like it. To generate a simple document you may want something more practical, like the HTML to OpenXML library.

I created an example Visual Studio 2012 Project (OpenXML SDK 2.5 dependency downloaded automatically via NuGet) in ASP.NET 4.0 that demonstrates how easy it is, thanks to this library, to generate a document. You can save a file on the server or stream it to the user. My example includes both cases.

Download WordGenerator.zip

Enjoy.

Bootstrap 3 add size between xs 480 and sm 768

If you, like me, were relying on bootstrap 3 for creating a responsive website and trying to style your elements in your grid, so that they look nice also between xs (480px) and sm (768px) you would have noticed that there are no col-* classes that support this particular case.

I googled and found a suggestion for improvement to add a new class called sm in bootstrap3. Sadly, the suggestion was ignored and if you need to make your website look good for window sizes between 480px and 768px you must implement the feature yourself, or use what the community (andyl in this case) is offering you.

Conclusion: if you need this feature, read the discussion I linked above and build bootstrap using the LESS or SASS scripts linked there. If you are still new to bootstrap, less, sass etc. the fastest way is to include andyl's bootstrap_ms.css (with my update).

Just include it after the main bootstrap file, like this:

<link rel="stylesheet" href="css/bootstrap.min.css" />
<link rel="stylesheet" href="css/bootstrap_ms.css" />

AngularJS angular-seed-master node js and karma

I was watching the pluralsight AngularJS fundamentals videos. The author didn't show how to configure the environment (Windows in my case) to be like in his videos, in particular node js and karma. I never used those, so I googled and found this detailed guide on how to set up node js and karma.

In my case, with angular-seed-master v1.2.4 (most up-to-date version), it was enough to download and install node.js, then open the windows command line and install karma with the default command (the last version is fine, no need to install 0.8.7 as the blog author suggested):

npm install -g karma

Then the tests work just fine.

Install Apache, PHP, Xdebug and MySQL on Mac OS X

In Mac OS X 10.9, apache, php and xdebug are already installed. To activate and configure them (and to install MySQL), follow this guide: Get Apache, MySQL, PHP and phpMyAdmin working on OSX 10.9 Mavericks

For Xdebug, add this at the end of the php.ini file (sudo vi pathtoyourphp.ini) (in vi, press "G" to go at the end):

[Xdebug]
zend_extension=/usr/lib/php/extensions/no-debug-non-zts-20100525/xdebug.so
xdebug.remote_enable=1
xdebug.remote_host=localhost
xdebug.remote_port=9000

Check also: Configuring Xdebug in PhpStorm

Check this webinar: Debugging PHP with PhpStorm (or directly this YouTube video)

Remember that you have to manually start apache:

sudo apachectl start
sudo apachectl stop
sudo apachectl restart

To start/stop MySQL, if you followed the initial guide, you already know that you can find a MySQL icon in your System Preferences.