This is a shopping list if you are interested to buy an affordable (best price/features) Cheerson CX-20 drone and related accessories for more fun.
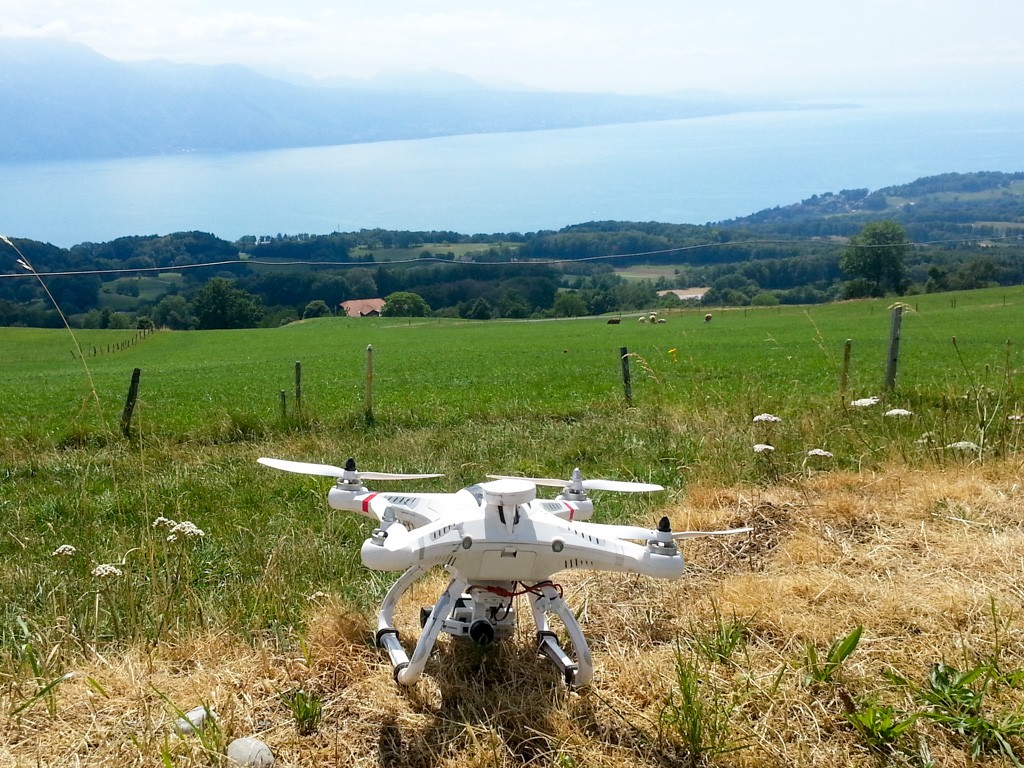
This was my 1st choice when I decided to buy a drone (from a beginners perspective) back in March 2015. Then I "modded" it to get the feeling on how it is to cultivate this hobby and of course to capture better footage (the gimbal was the first priority, as the videos taken with the standard gimbal were trembling a bit). I crashed it several times, not only in the first days but also months later and you know what? It still flies well! It's really a good machine to start a drone adventure and little crashes don't ruin it too much. Just the shell.
For more options check also this post: Cheap drones under 300 USD to attach your GoPro
Note: I own a Cheerson CX-20 and bought everything from bangood. Banggood is an excellent online shop. Free shipping for most of the items (for big items like the drone you may pay a little fee, but all accessories are sent for free) and they arrive in Switzerland in around 2-3 weeks, exceptionally in 4 weeks.
I recently did a compilation of my adventures and stupid, funny things done with my 1st drone in summer and autumn 2015. I can tell you one thing: you wanna do your experiments with a cheap drone. Besides some bad crashes that ruined the body and the legs of the Cheerson CX-20 (which can be replaced) I'm quite happy that it is still in good conditions.
Mandatory things to buy
Note: prices checked and updated on 2016-12-28.
- Cheerson CX-20 RTF: 216 USD (the drone, ready to fly)
- A set of spare propellers: 12 USD
Recommended to buy
1 or 2 extra batteries are recommended. A 2800 mAh (already included in the RTF package) battery has an autonomy of around 15 minutes. I have a 2200 mAh battery with a broken cell and it can fly for around 8 minutes + 2 minutes "beeping" reserve.
- BlackMagic 3000mAh 11.1V Battery: 27 USD
If you want a bigger battery you'll need to adjust the battery tray (DIY). See this video on Youtube to get an idea: CX20 Battery tray conversion for High Capacity battery. I did it but honestly I don't think it's worth it: extending the plastic to make the compartment higher for the battery to fit makes it harder to close the shell, and also it creates a lot of tension in the structure. Buy 2 more batteries instead, trust me.
Optional to buy
The 1st thing I bought with my drone is the imax recharger and I'm quite happy I did so. It is much faster then the original minimalistic charger included with the drone. It has also functions to discharge batteries, or putting them in storage mode. This can make batteries last longer.
- Imax B6-AC battery recharger: 33 USD (this is a cloned version of the skyrc. It works perfectly for me. Buy the original if you want the best quality).
- SKYRC iMAX B6AC V2 Professional: 56 USD (this is the original, better quality imax)
- Lipo Bag: 6 USD (if a battery short circuits and starts to burn you may want it inside of a lipo bag and not on your floor, or in your bag... so for you safety you may want one of those).
- Li-Po Battery Balance Charging Extension Wire Cable 20cm: 1 USD (take for 3S: this is useful if you wanna recharge your battery inside a lipo bag. The battery balance cable is too short, this extension makes it easier & safer).
- A metallic box (like those you buy to put some money in it, or ammunition boxes) to store your batteries. Same: if the batteries explode you may want them in a metal box. A lipo bag helps a bit but is not 100% effective.
- Propellers protectors: 11 USD (it's not recommended to fly with these, but especially when you are a newbie, your first 10 flights are crucial. Trust me: I already had some experience with other smaller drones, but in my first 10 flights with this class (a bit heavier and quite sensitive controls) I had 4 crashes and broke 2 propellers. Buy and use these protectors for your first flights and you won't regret it). If you break the protectors it's not a tragedy, you can fix them with some super glue and they can protect your drone again.
- DJI Phantom / Cheerson CX-20 backpack: 66 USD (this is a must for bikers or city pilots. I use a 35l Dakine backpack for my CX-20 but this is much better because it has several compartments to keep everything safe, plus it can be opened like a trolley)
- 2 sets of CX-20/DJI Phantom propellers: 4 USD each
After some crashes
After some crashes I personally realized that the material of this drone is quite fragile... the body was the first to get smashed. I could duct tape it together but after every consecutive crash I had to do the duct tape job again and again... the legs got broken as well thus:
- Cheerson CX-20 RC Quadcopter Spare Parts Body Shell Cover Set: 36 USD
- Cheerson CX-20 RC Quadcopter Spare Parts Skid Landing CX-20-019: 9 USD
Accessories for cool videos
If you are into videography you may already have a GoPro. GoPro is like the iPhone of the drones. You pay much more for the brand, and have of course the best quality. But you may consider a cheaper action camera.
Action camera
If you have a GoPro and you are afraid to destroy/lose it you may buy a cheaper alternative for the drone, till you get more confident. But generally speaking, check in youtube comparison videos for those cameras and judge yourself. The quality is quite ok, you may even not need a gopro at all: one of those cams can be good enough for you.
- SJcam SJ5000 for 119 USD
- Xiaomi Yi (US edition) on Amazon for 79 USD
- Mobius for Multirotor for 69 USD. This is quite a good cam, especially because it's very light with its 40g weight!
Gimbal
If you buy a camera you may want to have it stabilized with a gimbal. I bought the Walkera G 2D and can recommend it. It's almost plug and play: you attach a slider to the CX-20 bottom and you slide the gimbal in. There is a cheaper gimbal, for 50 USD, but you need to drill the drone and other modifications to make it work. Spend 20 bucks more and save time and hassle. Check this video on youtube to see how it's easy (with some considerations about the length of the tripod) to mount the Walkera G-2D: Cheerson CX20 FPV Setup Part 1.
- Gimbal Walkera G-2D: 64 USD
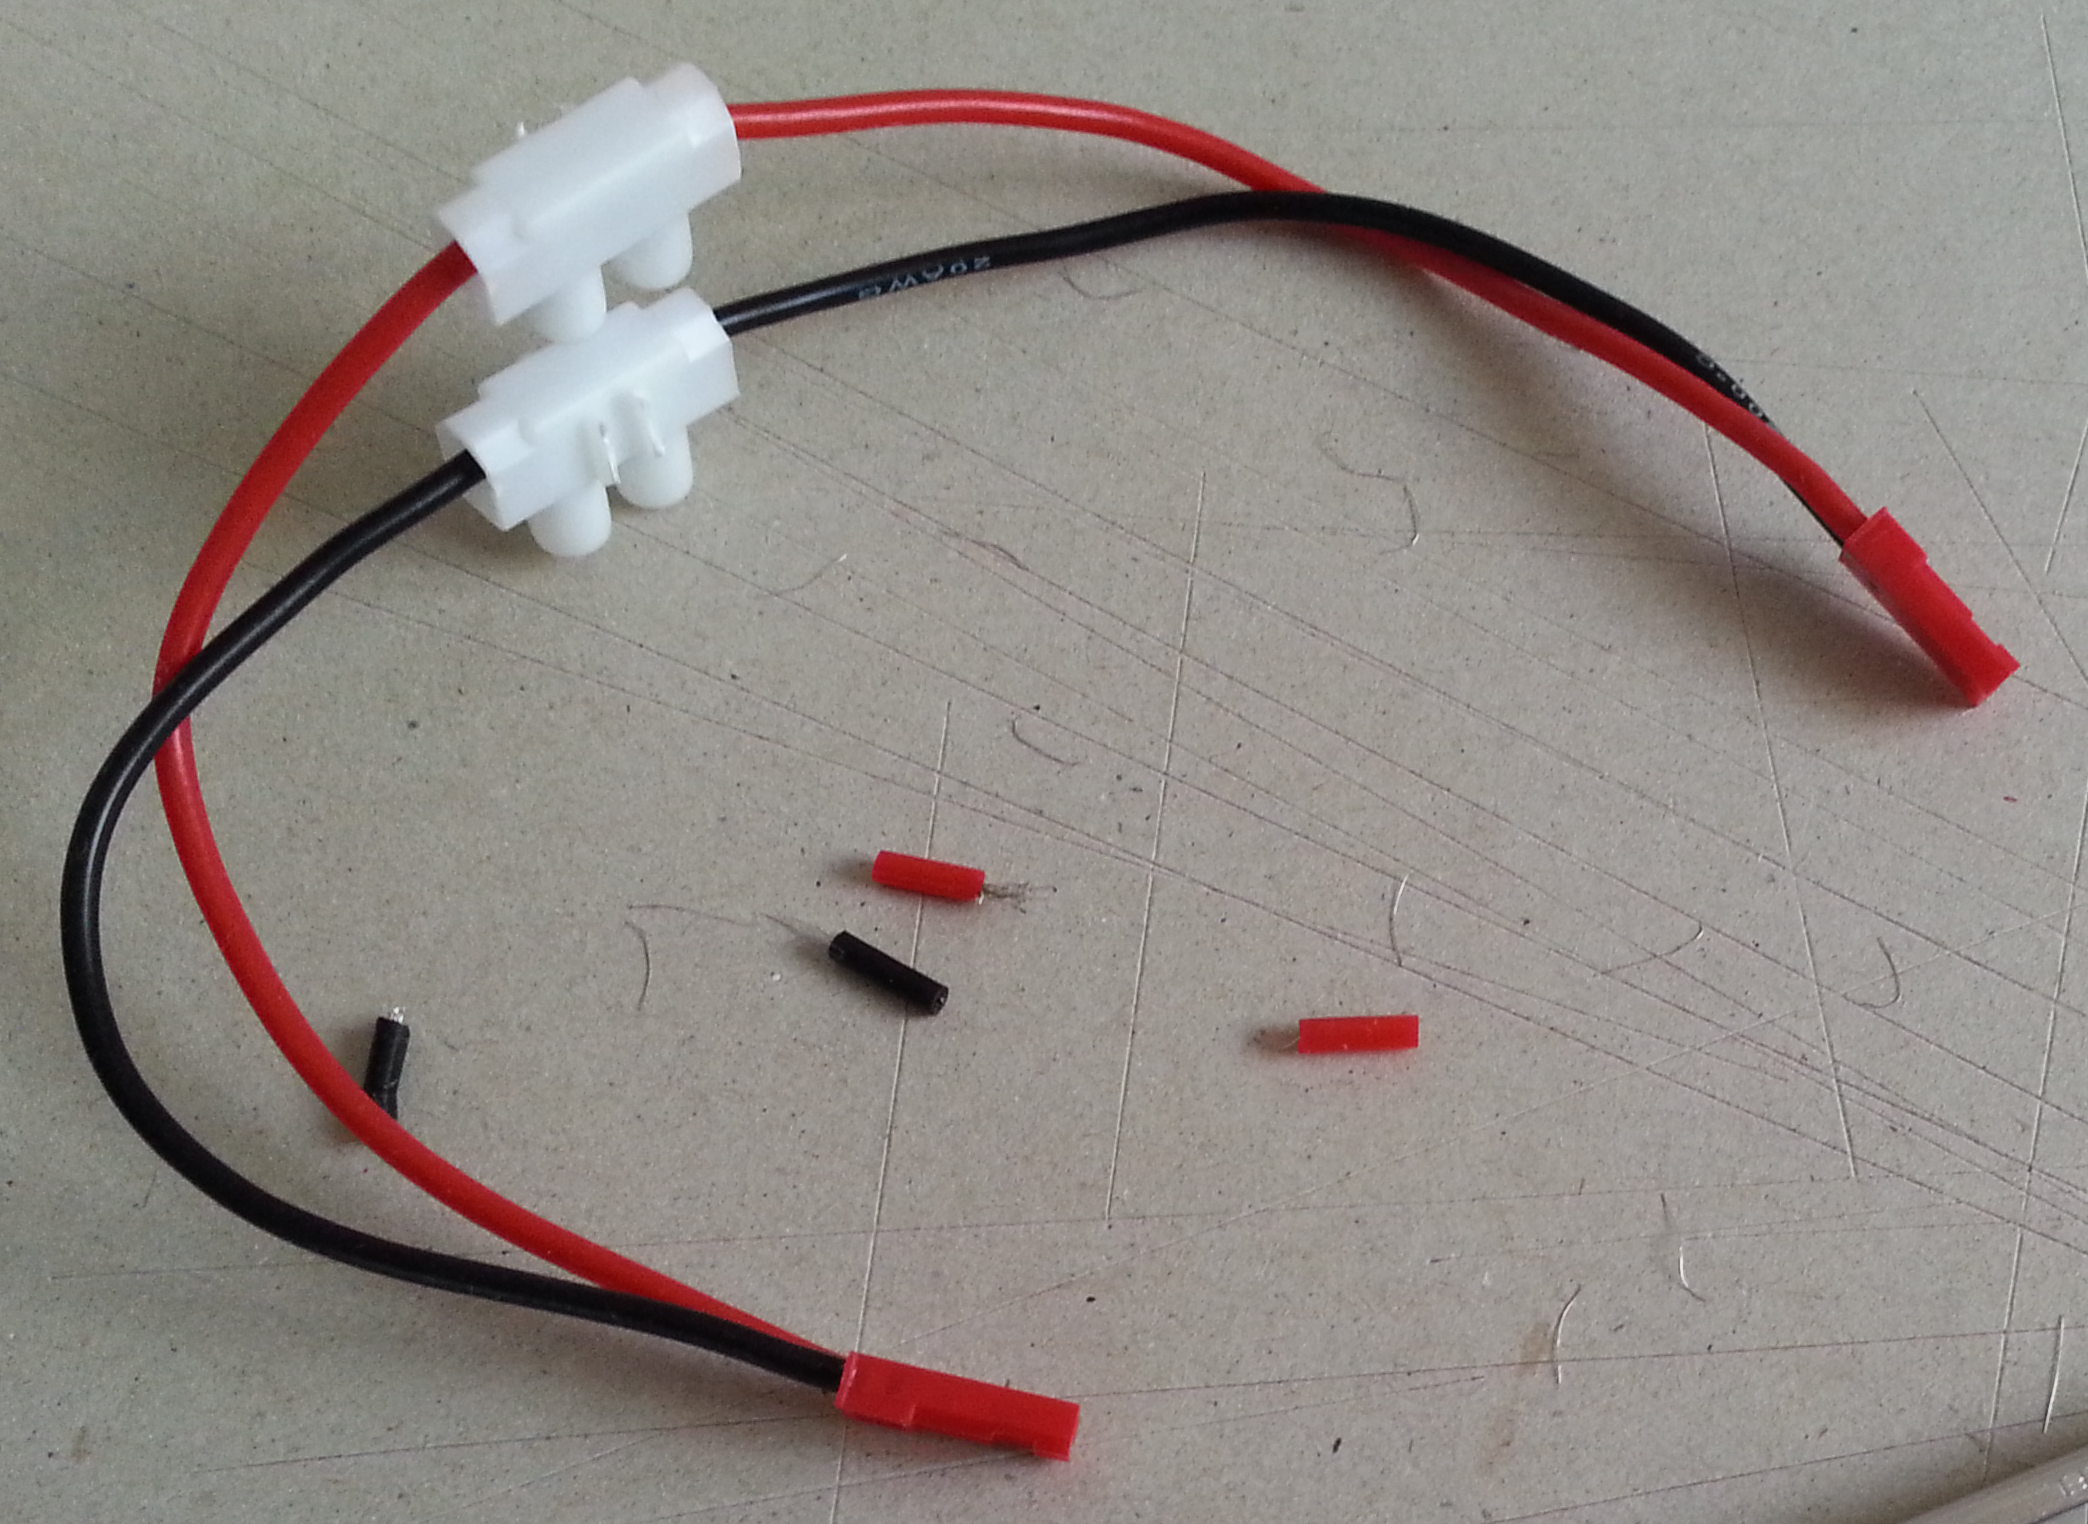
- 2 x JST Connector Plug With Connect Cable For RC BEC ESC Battery: 1 USD (buy 2 of those cables to connect the gimbal power to the G OUT IN of the drone. You need to solder/attach them together as shown in the following picture).
FPV
The final pimp for my drone was the FPV kit.
Check my review and HOWTO about the Cheerson CX-20 FPV kit.
Minimal FPV Setup
UPDATE February 2016: if you don't care about filming, so if you don't need a gimbal and you don't need a gopro or another action camera, but you want to have a minimal FPV setup, check this kit containing a lightweight camera, antennas and a monitor:
JJRC H16 YiZhan Tarantula X6 Camera With Monitor: 52 USD
With little effort you can adapt the YiZhan FPV kit for the Cheerson CX-20 (youtube video).